AeroPress Recipe Guide: Dose And Ratio
AeroPress Recipe Guide: Dose And Ratio
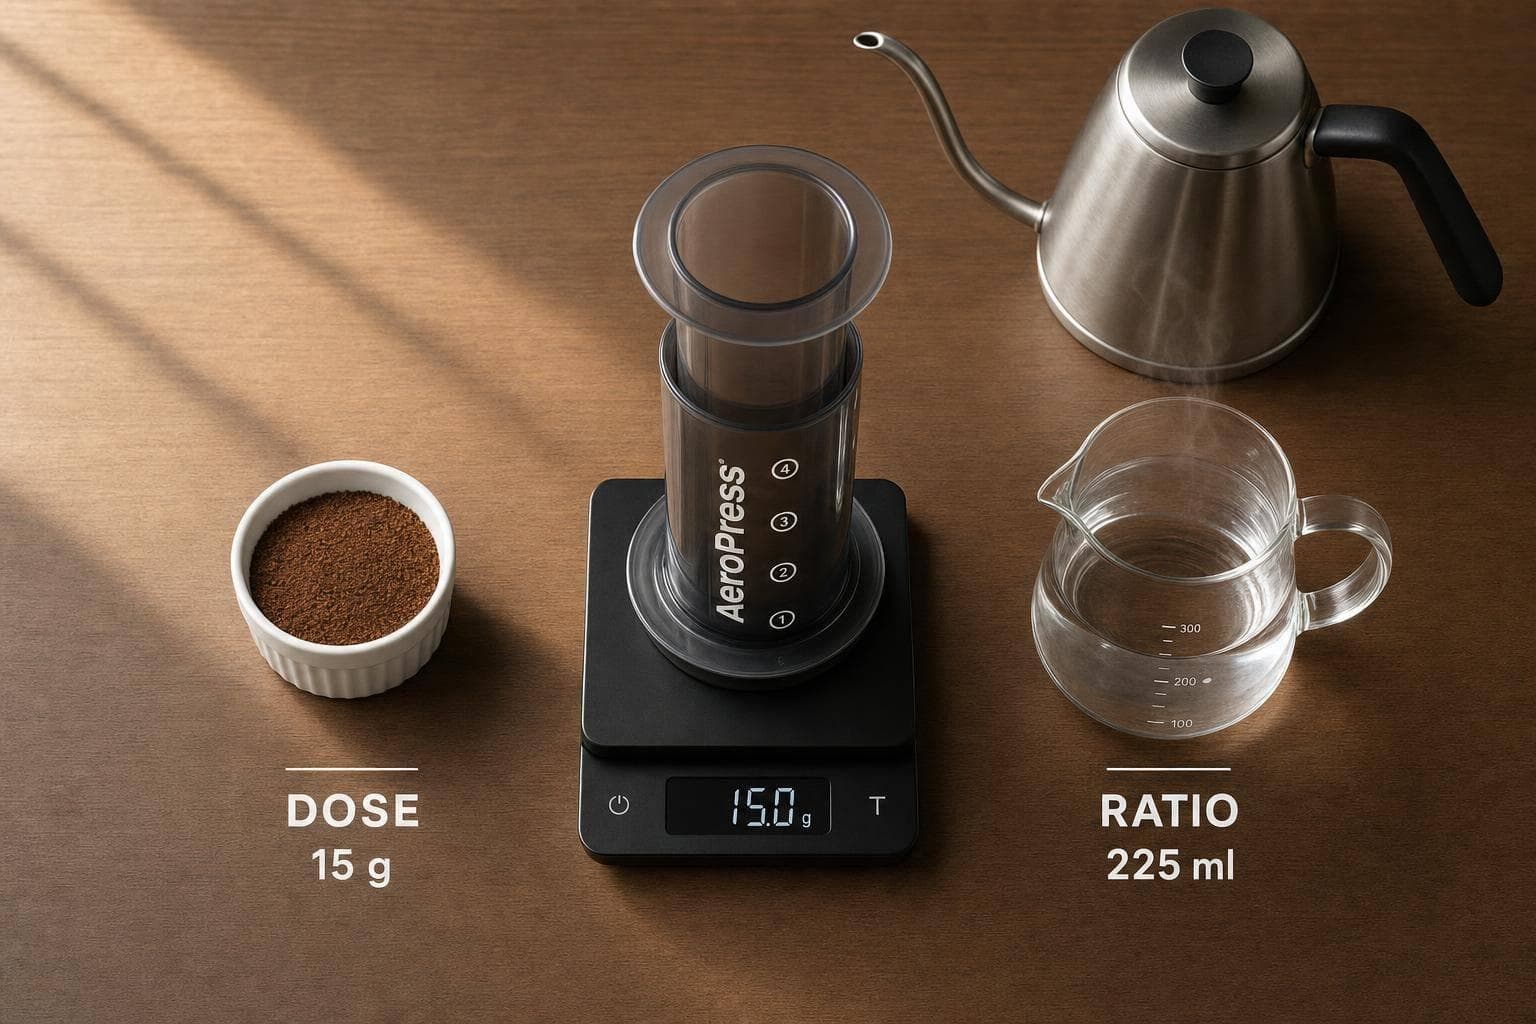
Most AeroPress cups get fixed by changing just 2 things: dose and ratio. If I start with 12 g to 18 g for a daily cup and a ratio between 1:13 and 1:17, I can dial in strength fast. For milk drinks or iced coffee, I go tighter - often 1:3 to 1:10.
Here’s the short version:
- Dose = how much dry coffee I use, in grams
- Ratio = coffee to water, written as 1:X
- Daily hot cups usually land around 1:14 to 1:16
- Standard method leans cleaner and brighter
- Inverted method leans heavier and more rounded
- Bypass brewing helps me make a 10–12 fl oz mug from one press
- Iced recipes use less brew water and add ice
- Espresso-style recipes use tight ratios like 1:3, but they are not true espresso
If I want a fast starting point, this is what I use:
| Style | Common Ratio | Dose Range | Best For |
|---|---|---|---|
| Standard | 1:15–1:16 | 15–17 g | Daily hot coffee |
| Inverted | 1:12–1:15 | 15–18 g | Stronger cups |
| Bypass | 1:3–1:6 brew, then dilute | 15–24 g | Large mugs, milk drinks |
| Iced | 1:6–1:10 | 17–20 g | Hot-over-ice coffee |
| Espresso-style | 1:3 | 20 g | Lattes, Americanos |
A few rules matter most. Use more water for a lighter cup. Use less water for a stronger cup. I also keep water around 185°F to 205°F, with hotter water for light roasts and cooler water for dark roasts. If a cup tastes sour, I grind finer or steep a bit longer. If it tastes bitter, I grind coarser or back off the extraction.
That’s the whole framework: pick the brew style, set the ratio, then fine-tune grind and temperature.
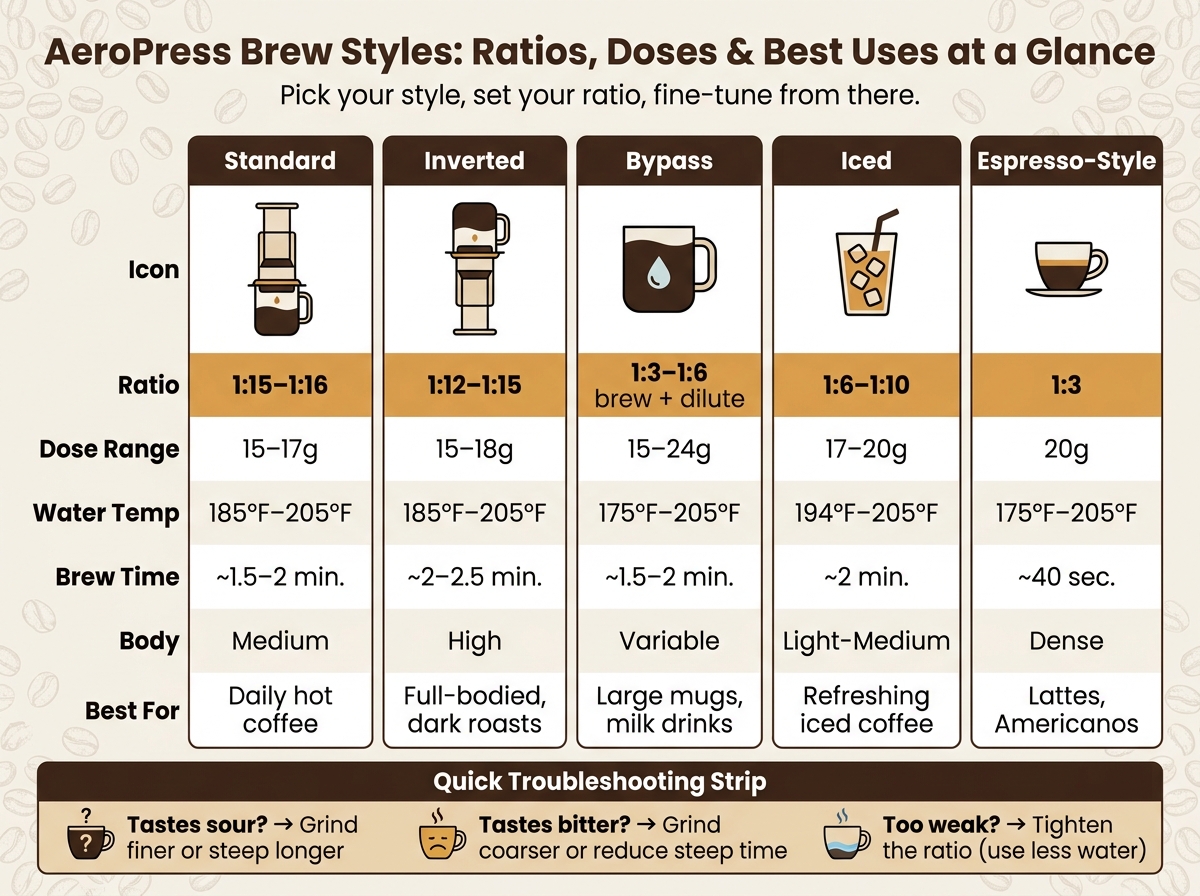
AeroPress Brew Styles: Ratios, Doses & Best Uses at a Glance
Standard and Inverted AeroPress Recipes
Standard method recipes for balanced daily cups
These recipes take the ratio ranges above and turn them into repeatable starting points.
The standard method sits on the mug and starts draining during the steep. That usually gives you a brighter, cleaner cup, which makes it a good fit for light roasts from independent coffee roasters and brews where clarity is the goal. Use a medium-fine grind, about the texture of table salt, and brew at 185°F to 205°F. Go hotter for light roasts and cooler for dark roasts.
| Recipe | Dose | Water | Ratio | Steep Time | Press Time | Approx. Yield | Flavor |
|---|---|---|---|---|---|---|---|
| Classic Balanced | 15g | 250g | 1:16.6 | 1:30 | 30s | ~8.5 fl oz | Sweet, clean, balanced |
| Everyday Cup | 15g | 200g | 1:13.3 | 1:30 | 30s | ~6.5 fl oz | Balanced, easy to drink |
| Loom Standard | 15g | 225g | 1:15 | 1:30 | 45–60s | ~7.5 fl oz | Clean, exceptional sweetness |
| Pure Earth Classic | 17g | 250g | 1:14.7 | 1:30 | 30s | ~8.0 fl oz | Approachable, low acidity |
Stop pressing at the first hiss to avoid bitterness and sediment.
Choose the standard method when you care more about clarity than body.
Inverted method recipes for stronger immersion brews
With the inverted method, you flip the AeroPress upside down so the plunger sits at the bottom. That means no brew water escapes until you flip it onto your mug, so the grounds stay in full contact with the water for the whole steep.
Before you flip, insert the plunger at least 1 cm into the chamber so it stays sealed.
| Recipe | Dose | Water | Ratio | Steep Time | Press Time | Approx. Yield | Flavor |
|---|---|---|---|---|---|---|---|
| Inverted Rich | 18g | 220g | 1:12.2 | 1:45–2:00 | 30s | ~7.0 fl oz | Round, heavy mouthfeel |
| US Champ | 15g | 180g | 1:12 | 1:30 | 60s | ~7.0 fl oz | Clean, balanced, aerated |
| Pure Earth Inverted | 15–18g | 220–260g | 1:14.5 | 60–90s | 30s | ~7.5 fl oz | Floral, fruit-forward |
Use bypass water when you want a larger mug or a concentrate that’s ready for milk.
Standard vs. inverted: when to adjust the ratio
Here’s the simple version: use standard for clarity and speed, and use inverted for more body and longer contact time.
| Method | Dose | Water | Ratio | Brew Time | Body | Clarity | Best Use Case |
|---|---|---|---|---|---|---|---|
| Standard | 15–17g | 225–250g | 1:15–1:16 | 1.5–2.0 min | Medium | High | Daily balanced cups; light roasts |
| Inverted | 15–18g | 200–230g | 1:12–1:15 | 2.0–2.5 min | High | Medium | Full-bodied brews; dark roasts |
If a standard brew tastes thin, switch to inverted. If an inverted brew feels too heavy, widen the ratio.
Use standard for clarity and inverted for body; next, bypass water lets you scale up or dilute concentrates.
sbb-itb-af00fa5
Bypass, Concentrate, and Larger-Serving Recipes
Bypass recipes for a 10 to 12 fl oz mug
If a standard AeroPress cup feels too small, use a bypass or concentrate approach. The idea is simple: brew a small, strong coffee concentrate, then add hot water until you reach the cup size you want. It’s an easy way to make a 10 to 12 fl oz mug from a single press.
Because you’re brewing with less water at first, a medium-fine grind helps pull enough flavor from the coffee.
Concentrate ratios for dilution and milk drinks
That same concentrate can do double duty. It works well for milk drinks and iced drinks, and it also gives you more control over larger black coffees.
Use these ranges as a starting point:
- 1:6 to 1:8 for milk drinks
- 1:8 to 1:12 for larger black cups
Water temperature matters too. Use 175°F to 185°F for dark roasts and 195°F to 205°F for light roasts.
When you add bypass water, do it in stages and taste along the way. That small step can make the difference between a cup that feels thin and one that lands right where you want it.
Dose, brew water, and bypass water by serving type
| Intended Use | Dose | Brew Water | Ratio | Bypass Water | Cup Yield |
|---|---|---|---|---|---|
| Milk Base Concentrate | 18–20g | 60–80ml | ~1:3–1:4 | 0ml | ~50–70ml |
| Balanced Americano | 15g | 80ml | ~1:5 | 150–180ml | 240ml (~8 oz) |
| Large Mug (10 fl oz) | 20g | 120ml | 1:6 | 180ml | 300ml (~10 oz) |
| Large Mug (12 fl oz) | 24g | 142ml | 1:6 | 213ml | 355ml (~12 oz) |
| Two Servings | 35g | 150ml | ~1:4 | 160–200ml | 310–350ml |
For two servings from one press, brew 25–30g of coffee with 150–200ml of water, then split the concentrate between two mugs and let each person dilute to taste.
Press only until you hear the hiss, then stop. If you keep going, you can force extra air and sediment into the concentrate.
How To Brew On The AeroPress (Onyx Coffee Lab Brew Guide)
Iced and Espresso-Style AeroPress Recipes
When bypass ratios start feeling too big or the drink still comes out too warm, it helps to switch gears. Iced and espresso-style AeroPress recipes are built for three things: cooling the cup fast, rounding out acidity, or making a concentrate that stands up well to milk.
Iced AeroPress ratios for hot-over-ice brewing
Flash brew, sometimes called Japanese-style iced coffee, is one of the most dependable ways to make iced AeroPress coffee. The idea is simple: brew a hot concentrate straight over ice, then let the melting ice bring the drink down to full strength. That fast chill helps the cup stay balanced instead of turning flat or muddy.
A solid place to start is 17g of coffee with 100g of hot water brewed over 130g of ice. Use water between 194°F and 205°F to make up for the cooling effect of the ice. A medium-fine grind helps pull enough from the coffee in a short brew.
If you want a brighter iced cup, go with flash brew. If you want less acidity, cold steep tends to work better.
Cold and room-temperature AeroPress options
Cold-steep AeroPress brewing gives up speed in exchange for a smoother, lower-acid cup. Instead of heat, it leans on time. Use cold or room-temperature water, a medium-coarse grind, and steep anywhere from 2 to 20 minutes based on how much extraction you want. The same ratio logic still applies, but here time and grind size do most of the heavy lifting.
The AeroPress Official Cold Steep recipe uses 20g of coffee with 100g of cold water at a 1:5 ratio with a total brew time of 2 minutes and 45 seconds. If you want a lighter, more diluted cold cup, you can move closer to 1:10. As that ratio gets longer, a coarser grind and more steep time matter more.
For the smallest and strongest AeroPress cup, cold recipes give way to espresso-style concentrate.
Espresso-style AeroPress concentrates
AeroPress can make an espresso-style concentrate, but it does not make true espresso. The manual pressure does not reach 9 bars. What gives these recipes their punch is the tighter ratio, not pressure. Even so, the result works well in lattes, cappuccinos, and Americanos.
For a standard espresso-style shot, use 20g of coffee with 60g of water and a fine grind, then press in about 40 seconds. In these low-water recipes, use 205°F for light roasts and 175°F to 185°F for dark roasts. Stop pressing as soon as you hear the hiss.
| Recipe Style | Dose | Hot Water | Ice | Brew Ratio | Brew Time | Intended Use |
|---|---|---|---|---|---|---|
| Iced Flash Brew | 17g | 100g | 130g | ~1:6 (hot) | 2:00 | Refreshing iced coffee |
| Cold Steep | 20g | 100g (cold) | - | 1:5 | 2:45 | Smooth, low-acid concentrate |
| Espresso-Style | 20g | 60g | - | 1:3 | 0:40 | Lattes, Americanos |
How to Adjust Your Recipe and Choose Better Beans
A simple framework for going stronger or lighter
Once you’ve picked a brew style, you can fix most AeroPress cups fast.
It usually comes down to two levers: strength and extraction. If the cup tastes weak or watery, tighten the ratio. If it tastes sour, you likely need more extraction. If it turns bitter, back extraction down.
The easiest way to do that is simple: change one variable at a time. Adjust the ratio to change strength. Grind finer for sour cups. Grind coarser for bitter cups. Then tweak steep time or water temperature if needed.
Matching ratio to roast level and brew goal
Light roasts usually do better with 200°F to 205°F water and a finer grind. Dark roasts tend to work better at 185°F to 190°F with a coarser grind.
Use this chart as a quick starting point when you want a certain kind of cup.
| Brew Goal | Suggested Ratio | Dose Range | Method | Expected Result |
|---|---|---|---|---|
| Strong & Balanced | 1:13 – 1:14 | 17g – 20g | Inverted | Rich, sweet |
| Light & Tea-like | 1:16 – 1:17 | 12g – 15g | Standard | Light, delicate |
| Dark Roast / Smooth | 1:15 – 1:16 | 15g | Standard | Smooth, chocolatey |
| Iced / Flash Brew | 1:8 (hot) | 18g – 20g | Standard | Bright, crisp |
| Concentrate / Latte | 1:3 – 1:6 | 18g – 20g | Standard | Dense, espresso-like |
Key ratios to remember and where to find beans
A few numbers are worth keeping in your back pocket. A standard AeroPress recipe usually lands between 1:14 and 1:16 for a balanced everyday cup. Inverted recipes often run a bit stronger, around 1:12 to 1:15, since full immersion pulls more from the grounds. Bypass brewing is handy when you want a 10 to 12 fl oz mug without over-extracting. Iced recipes start more concentrated, usually 1:8 to 1:10, before the ice melts into the brew. And concentrate recipes for milk drinks or Americanos often sit around 1:3 to 1:6 before dilution.
After the ratio, the beans do a lot of the heavy lifting. Small Coffee Roasters lists 5,624 independent U.S. roasters by state or city.
FAQs
How do I choose my first AeroPress ratio?
Start by choosing the kind of brew you want: a standard cup or a concentrate.
For a direct, filter-style cup, a good starting point is 15g of coffee to 230g of water. That’s about 1:15 to 1:17. If you want a stronger brew to cut with water or milk, go with 1:10 or even stronger.
When you test and tweak, make small moves. Change the dose by 1g at a time and adjust only one variable per brew. That way, you can tell what actually changed the taste.
As a general rule, lighter roasts often do better with tighter ratios like 1:13. Darker roasts usually sit nicely around 1:16 or 1:17.
When should I use standard vs. inverted?
Use the standard method when you want a quick, simple brew or need something easy for travel. It’s the original setup, tends to spill less, and works especially well with lighter roasts when you’re after a cleaner cup with more clarity.
Use the inverted method when you want more control over immersion time and extraction. It stops early drip-through, which makes it handy for dialing in recipes, brewing concentrate, or making a fuller-bodied, sweeter cup.
How do I scale one press for a bigger mug?
Use the bypass method. The AeroPress chamber only holds about 250–270 mL, so you can't just pour in more water to make a bigger brew.
Here's the move: brew a concentrate at about 1:10 right into your mug. Then add hot water until you hit the volume and strength you want.
One small detail matters here: make sure your mug has enough room for both the concentrate and the extra water.